Push notifications have become one of the most effective levers for capturing users’ attention. They appear directly on the user’s screen, even when they are not browsing your website. Each notification includes a title, a message, a link, and an image. With Notifadz, we offer a turnkey solution for publishers as well as advertisers looking to leverage this channel. This article explains how to install the Notifadz plugin on WordPress, create Web Push campaigns, and track performance, before briefly introducing the Adrenalead advertising network.
- Advertisers and publishers: install the plugin and connect your account
- Automatically send an article as a push notification
- Integrate without a plugin or easily add a new domain via the Notifadz interface
- Create your first Web Push campaigns
- Discover the Adrenalead advertising network!
- Start using Push notifications on your WordPress site today!
Advertisers and publishers: install the plugin and connect your account
Case 1: you don’t have a Notifadz account yet
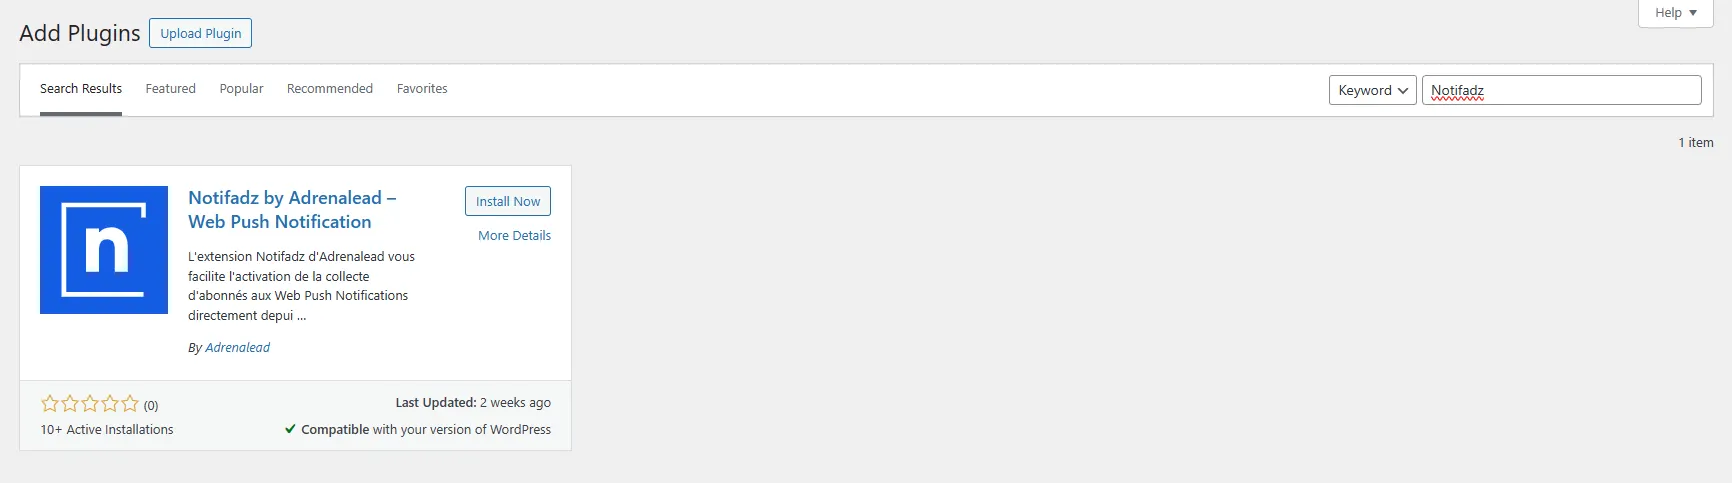
- Install the plugin: go to the WordPress admin panel, open Plugins → Add New, search for “Notifadz”, then click Install Now and Activate.
- Open the plugin: in the left-hand menu, select Notifadz Push to access the plugin interface.
- Create your account: click “Create an account” and fill in the requested fields (contact details, website URL, etc.), then confirm by clicking Create my account.
- Configure your opt-in template: after creating your account, customize the opt-in window that will be displayed to visitors. Choose one template for desktop and one for mobile. Adjust colors, copy, and placement if needed.
Case 2: you already have a Notifadz account
- Log in: on the plugin home screen, click “Already have an account?”, then enter the email address and password associated with your account.
- Validate the existing template: if an opt-in template is already linked to your account, a pop-up will notify you; simply click OK to validate it.
- Retrieve the integration key: if the plugin asks for a connection token, copy it from your Notifadz dashboard and paste it into the corresponding field.
Automatically send an article as a push notification
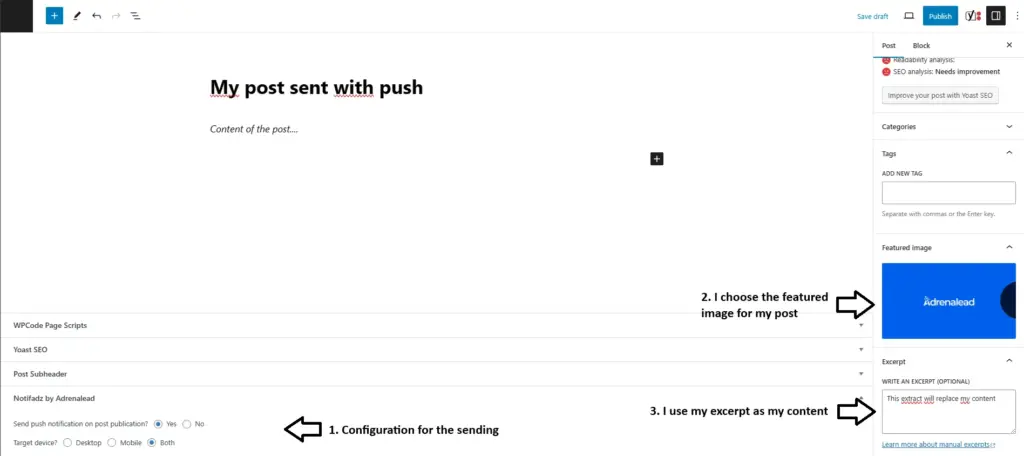
The WordPress plugin can turn your articles into push notifications as soon as they are published or scheduled. When writing a post, a “Notifadz by Adrenalead” panel appears: enable sending by checking “Yes – send this article as a push” and select the device type (desktop and/or mobile).
The notification is generated automatically: the title uses your article title, the message displays the first 200 characters or the excerpt you entered, the link points to the article URL, and the image matches the featured image.
Adrena’Tips: customizing the article excerpt helps optimize the notification copy, but this step is optional.
Integrate without a plugin or easily add a new domain via the Notifadz interface
If you manage multiple websites or want to integrate Notifadz without using the plugin, the Notifadz interface allows you to add a new domain in just a few steps.
- Add the site: log in to your Notifadz dashboard and click “Add a site”. Enter the site name and URL. The guide highlights that the process is simple and structured in three steps.
- Choose when to create the template: right after adding the site, you can either create the opt-in template immediately or choose to configure it later from the dedicated page. You are offered two options: “Create my opt-in template” or “I want to create my template later”.
- Create the opt-in template: select an opt-in box model, customize text, colors, and display scenarios, and define each step of the consent funnel. Each step is validated by clicking Next step until final saving.
- Integrate the script: once the template is saved, Notifadz provides a script to place in your site’s
<head>tag and a service-worker.js file to upload to the domain root. This integration enables opt-in windows and notification delivery.
Adrena’Tips: whether you integrate via the plugin or manually, test your opt-in window across different browsers (Chrome, Edge, Firefox, Safari) and on mobile to ensure a smooth user experience.
Create your first Web Push campaigns
Once your subscriber base is built, you can start sending your first scheduled notifications. Here are the key steps:
- Targeting: select the site to target and the device (desktop or mobile) in the Targeting and Device fields. Advanced options (time zones, segmentation) are optional and can remain default for optimal delivery. Note: city or ZIP-code geotargeting is reserved for drive-to-store campaigns.
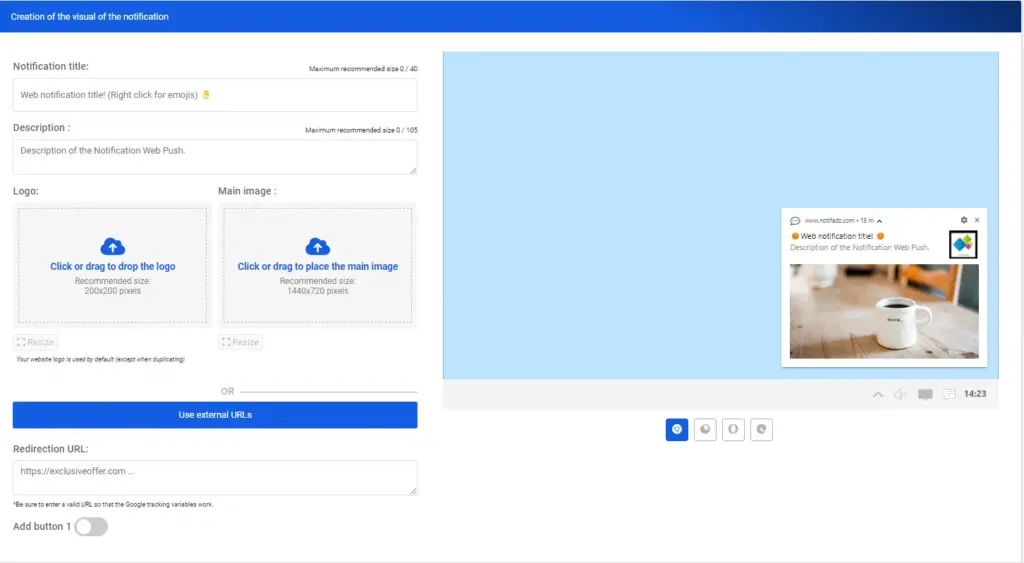
- Notification composition: fill in the following fields:
- Title: maximum 40 characters.
- Message: 105 characters on desktop or 40 on mobile.
- Logo: square image 220×220 px.
- Main image: 1000×500 px for desktop, 1000×400 px for mobile.
- Redirect URL: your website page or landing page.
- CTA: one or two optional buttons with their own text and URL.
A real-time preview lets you visualize the notification while editing.
- Scheduling: name your campaign and choose the send date and time. Use Google Analytics to identify traffic peaks and schedule delivery when your audience is most active.
- Advanced options: enable daily or weekly repetition, add UTM parameters to track conversions in Google Analytics, or test multiple creatives.
- Validation and sending: review the final look of your notification and click Schedule campaign to save and launch it. A confirmation message indicates that your first campaign is live.
Analyze performance
The My subscribers base dashboard in Notifadz lets you monitor the quality of your opt-in collection and optimize your campaigns. Key indicators include:
| Metric | Description |
|---|---|
| Impressions | Number of times the opt-in window was displayed during the selected period. |
| Opt-ins | Number of users who accepted notifications during the period. |
| Opt-in rate | Percentage of impressions that resulted in acceptance. |
| Opt-outs | Number of users who unsubscribed. |
| Total opt-ins | Total number of subscribers since the start of collection. |
You can change the analysis period by selecting different dates in the top-right corner of the dashboard. For each campaign, a detailed report shows the number of notifications sent, opened, clicked, and the conversions generated.
Discover the Adrenalead advertising network!
Notifadz relies on a Web Push advertising network that connects publishers and advertisers. Its operation is based on three phases:
- Consent: a user visits a partner publisher’s site and accepts notifications by clicking “Allow” in the browser prompt, thereby joining our network.
- Delivery: once opted in, the user can receive editorial notifications sent by the publisher, as well as advertising notifications sent on behalf of the publisher with the advertiser’s message—even when not browsing the site.
- Redirection: on click, the user is immediately redirected to the advertiser’s chosen landing page.
As an advertiser, two options are available to distribute your campaigns to the network’s subscribers:
- Direct deal: contact the Adrenalead teams, who will distribute your content to users via partner sites.
- Private marketplace deal: via your DSP.
Adrena’Tips: for look-alike or intent-based campaigns, our network also offers predictive targeting (“Intent Push”) to reach profiles similar to your audience who have shown purchase intent.

Start using Push notifications on your WordPress site today!
Whether you are a publisher or an advertiser, Notifadz provides a complete ecosystem for deploying push notifications on WordPress. Plugin installation is fast, campaign creation is guided through intuitive forms, and performance analysis relies on clear metrics.
By joining the Adrenalead network, you also gain access to a partner-site ecosystem that expands the reach of your messages. Start testing this solution today to capture your visitors’ attention and grow your revenue!